Purple & Teal Wedding – 04.20.13

In April of 2013, I said “I do” to my fabulous hubby. For today’s post, I thought I would share all the wonderful DIY projects we were able to incorporate in our special day. A BIG thank you to our photographers from Khloe Madison Weddings who took the amazing photos below.

First, my “Will You Be My Bridesmaid” Box. I opted to go “indian traditional” and chose sari’s for all my bridesmaid to wear at the wedding. Since all my bridesmaids were so close to me, I wanted to ask them in an extra special way. I decided to use printed boxes to hold the sari’s and then tiered cards to not only ask them, but provide them with the information about the day. The tiers were labeled “Our Day”, “My Girls”, “Your Sari” and “Your Role”.IMG_0793 copy

“Our day” informed them about the wedding date, time and location.

“My Girls” listed all the bridesmaids. The group included high school friends, college friends, a sister in law and future sister in laws, and since they did not all know each other, I thought it was important so they could all meet and greet prior to the big day.

“Your Sari” gave the girls info that I would like them to wear gold/copper shoes and other information about their fabulous ensemble.

“Your Role” let them know how much I appreciate them standing by my side and that I wanted them to enjoy the day as much as I would.

The girls absolutely loved the boxes and I did too!

PARAw_0060 copy

  In high school I took a graphic design class..little did I know that I would be using those skills to design my wedding programs! Using photoshop and with the help of a fabulous local printer, I was able to print these beauties.

JF-175 copy       PARAw_0238

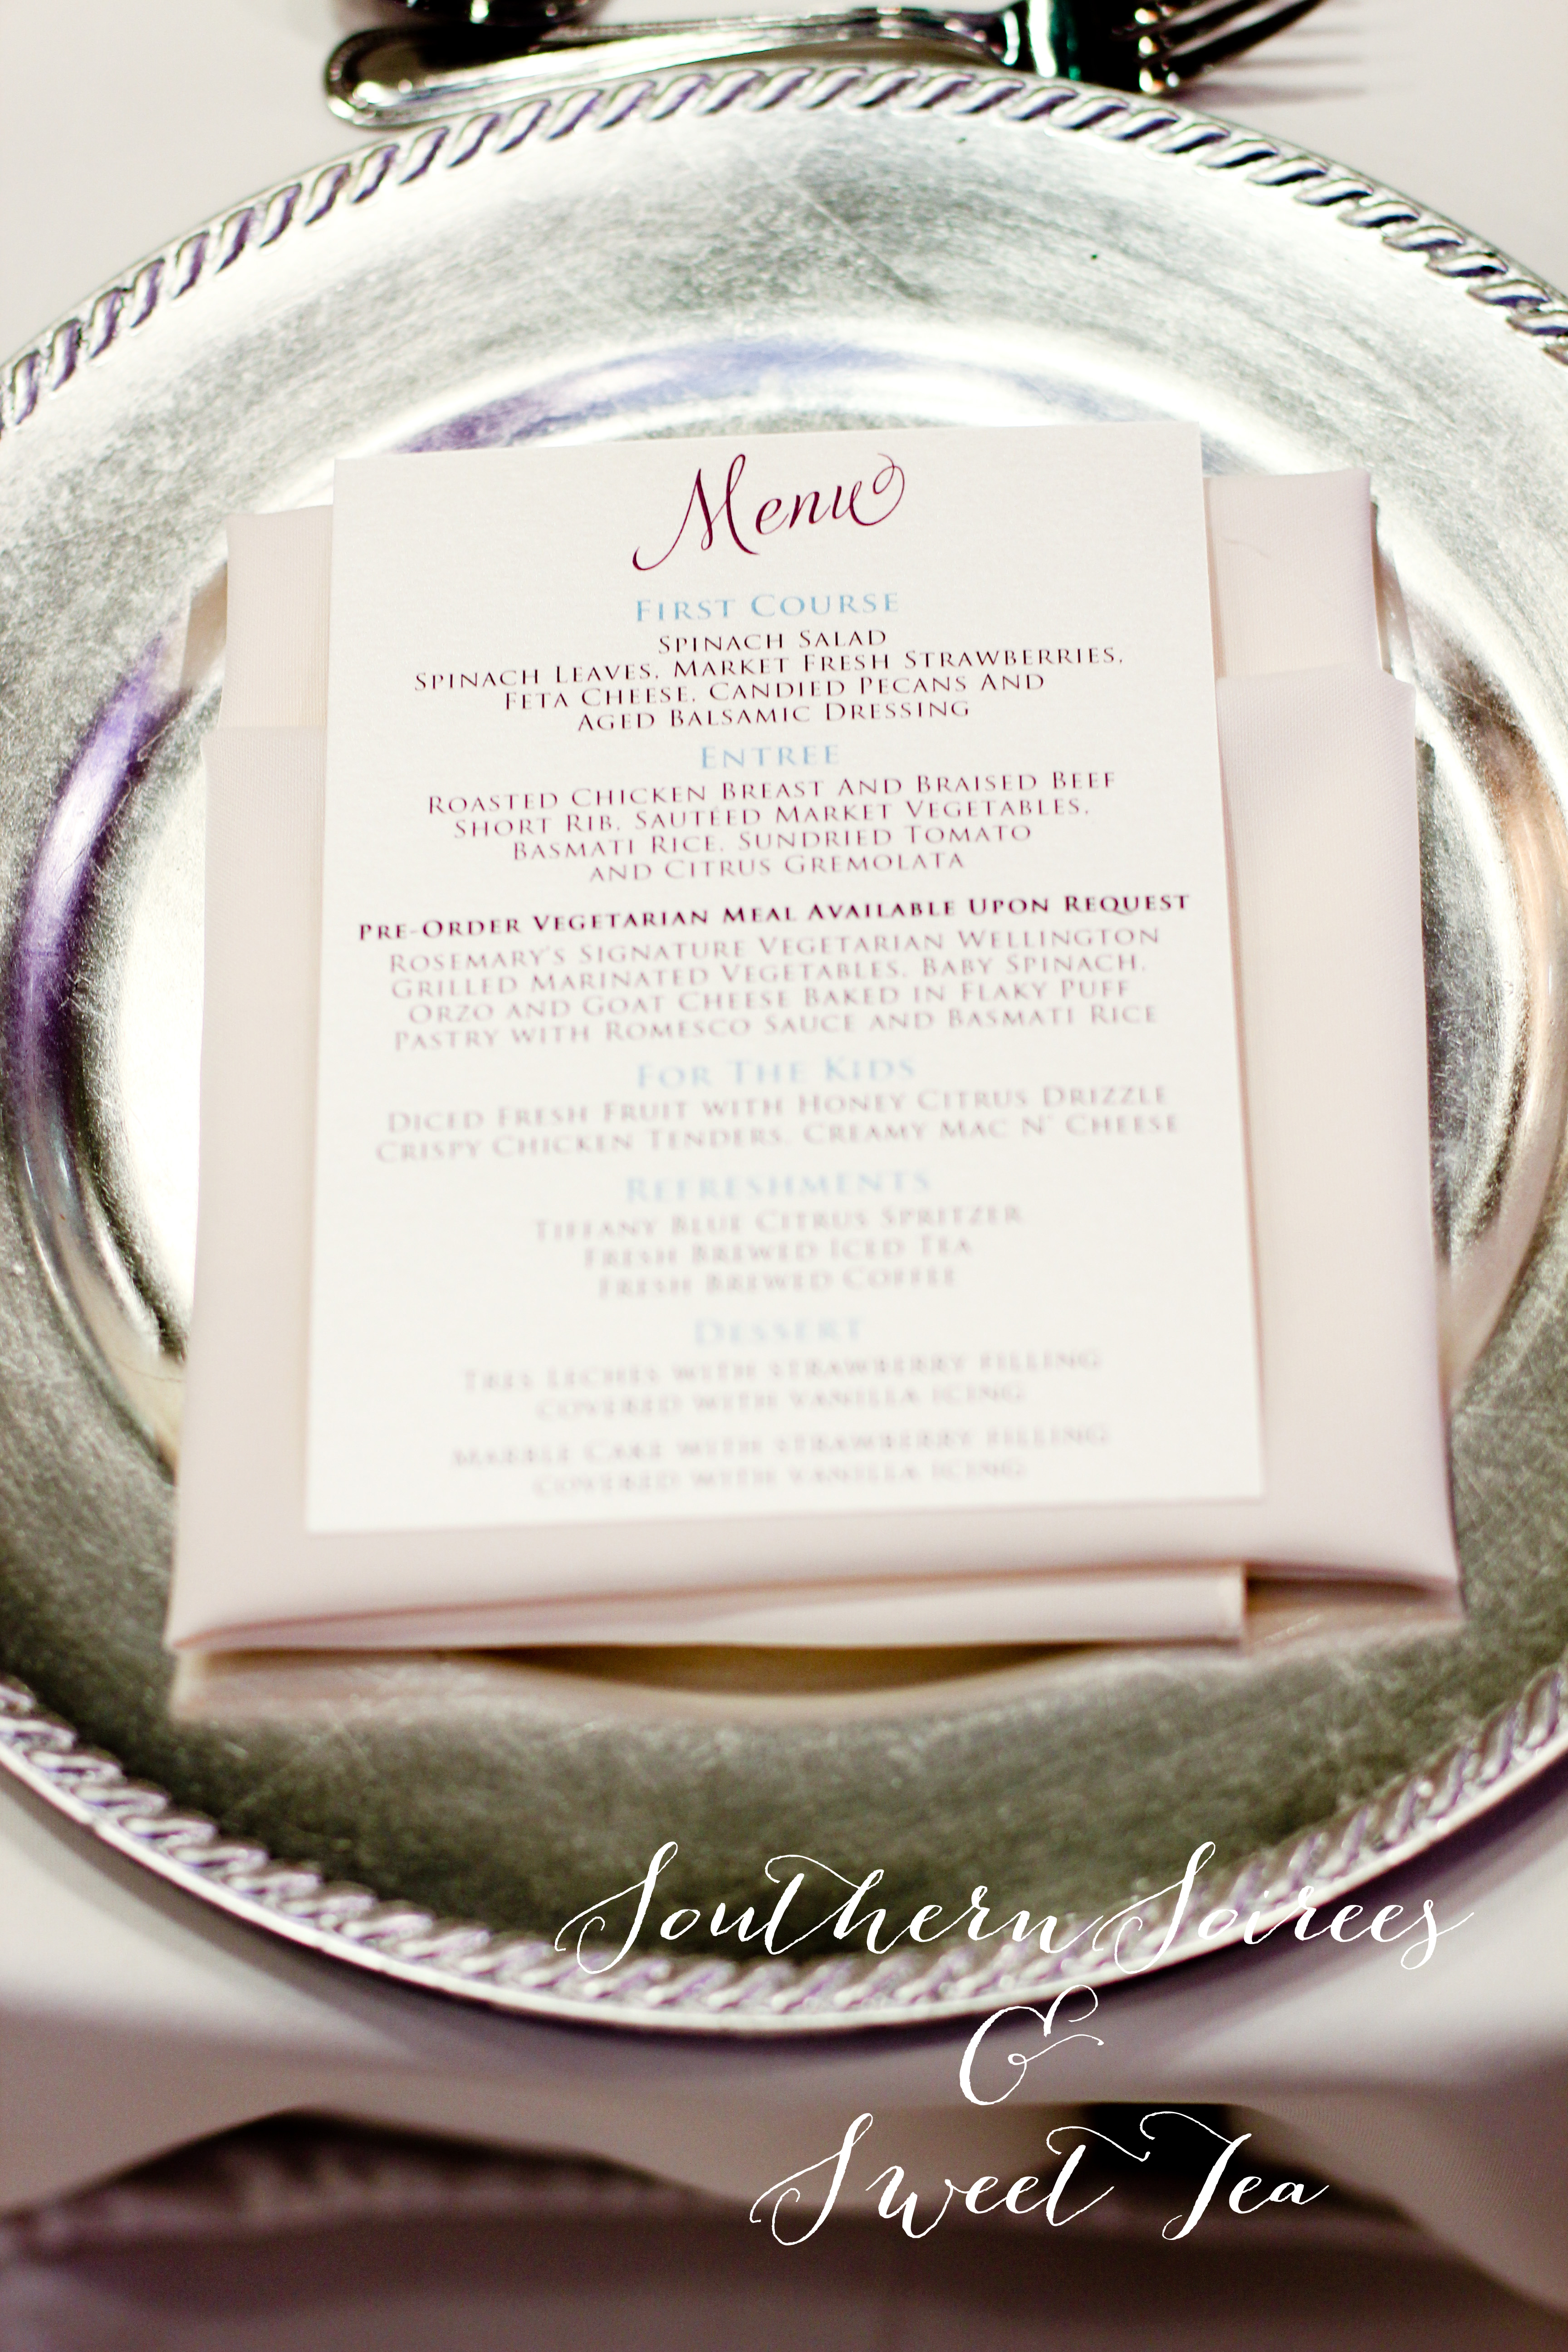
The reception menus were another DIY stationery. The reception was a seated lunch with 2 meats so the non-vegetarian guests were not asked for their meal preference prior to the meal. (I highly recommend this as it made seating at the reception A LOT easier) Since the guests did not know the meal, I thought it would be a nice touch to let them know details about the meal.  On the back of the menu, we included a “Thank You” to all the guests.

bridal party gifts

We all know that it’s sometimes stressful to be in a bridal party. Our wedding was a morning wedding, so the entire crew was up at 4am the day of to start the makeup and hair process. Since I knew they would be not only exhausted, but probably missing a few essentials, I surprised the entire bridal party (guys and girls) with gable boxes filled with a ton of goodies. The boxes not only included snacks, but lotion, Burt’s Bees, hand sanitizer, oil absorbing sheets, a mini nail file and mints. Guys of course got more “manly” items.

I thought this was a great to show our appreciation and the guys and gals absolutely LOVED them.

PARAw_0285 copy PARAw_0282 copy

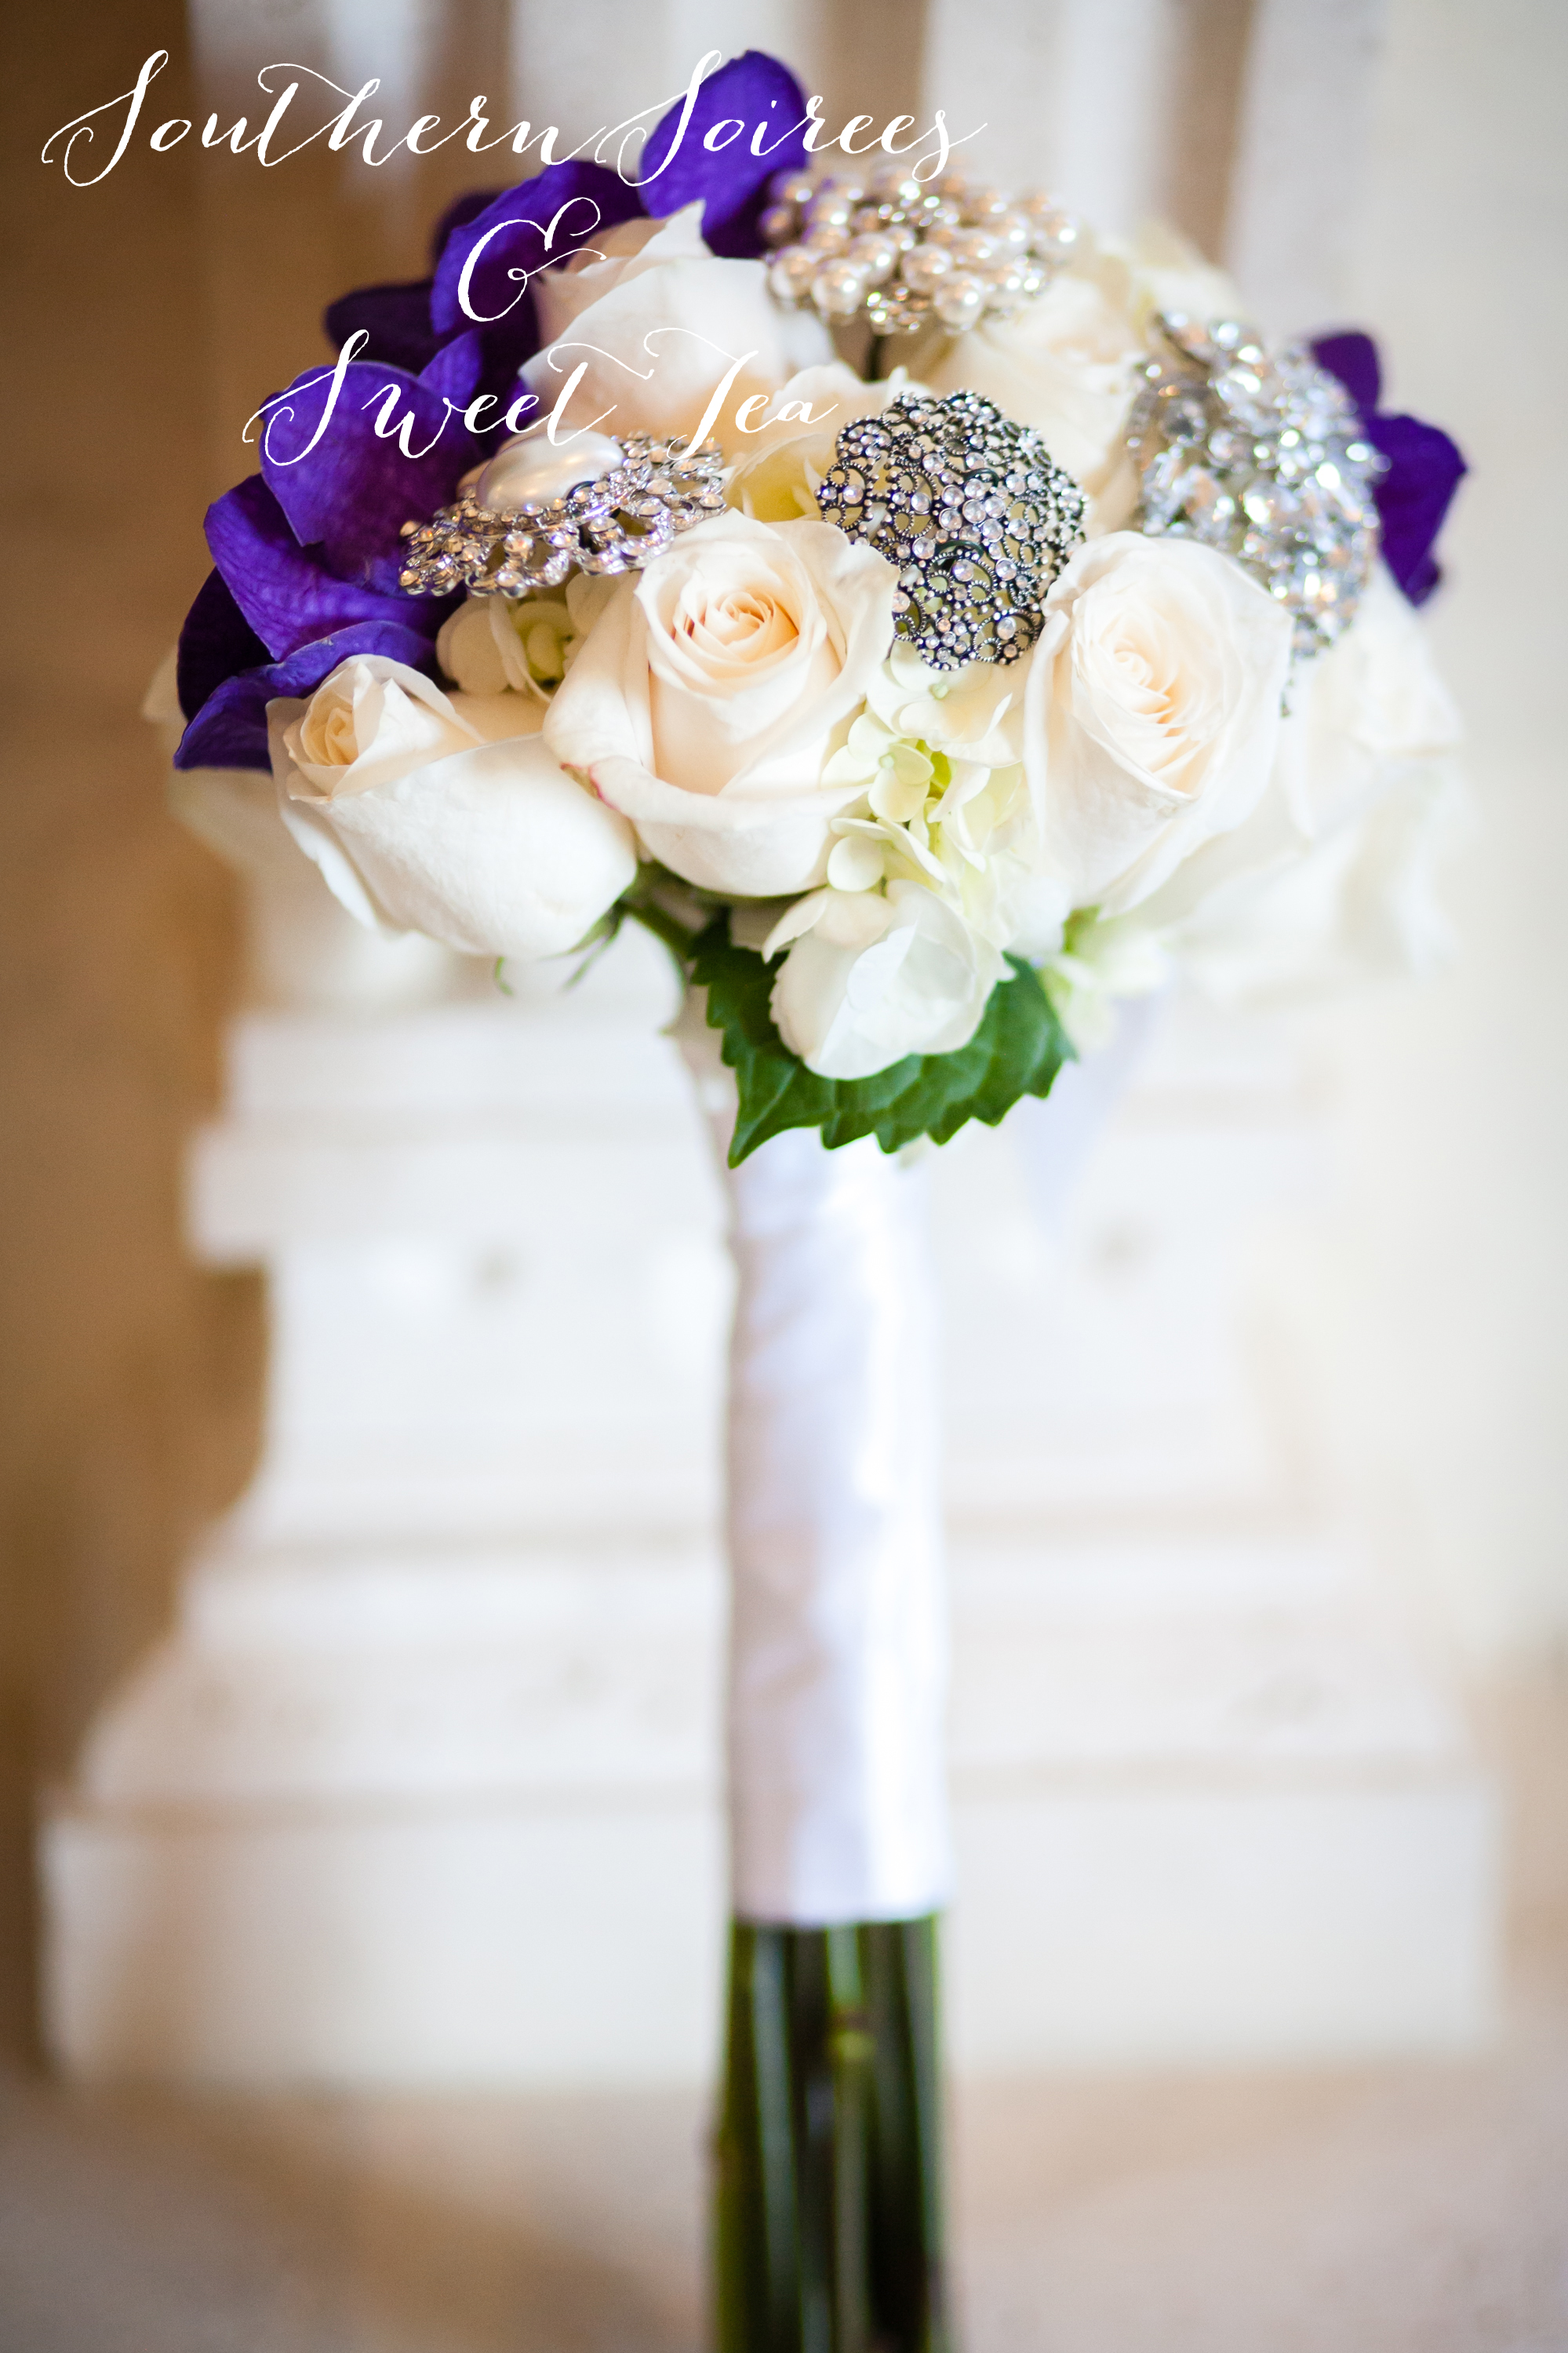
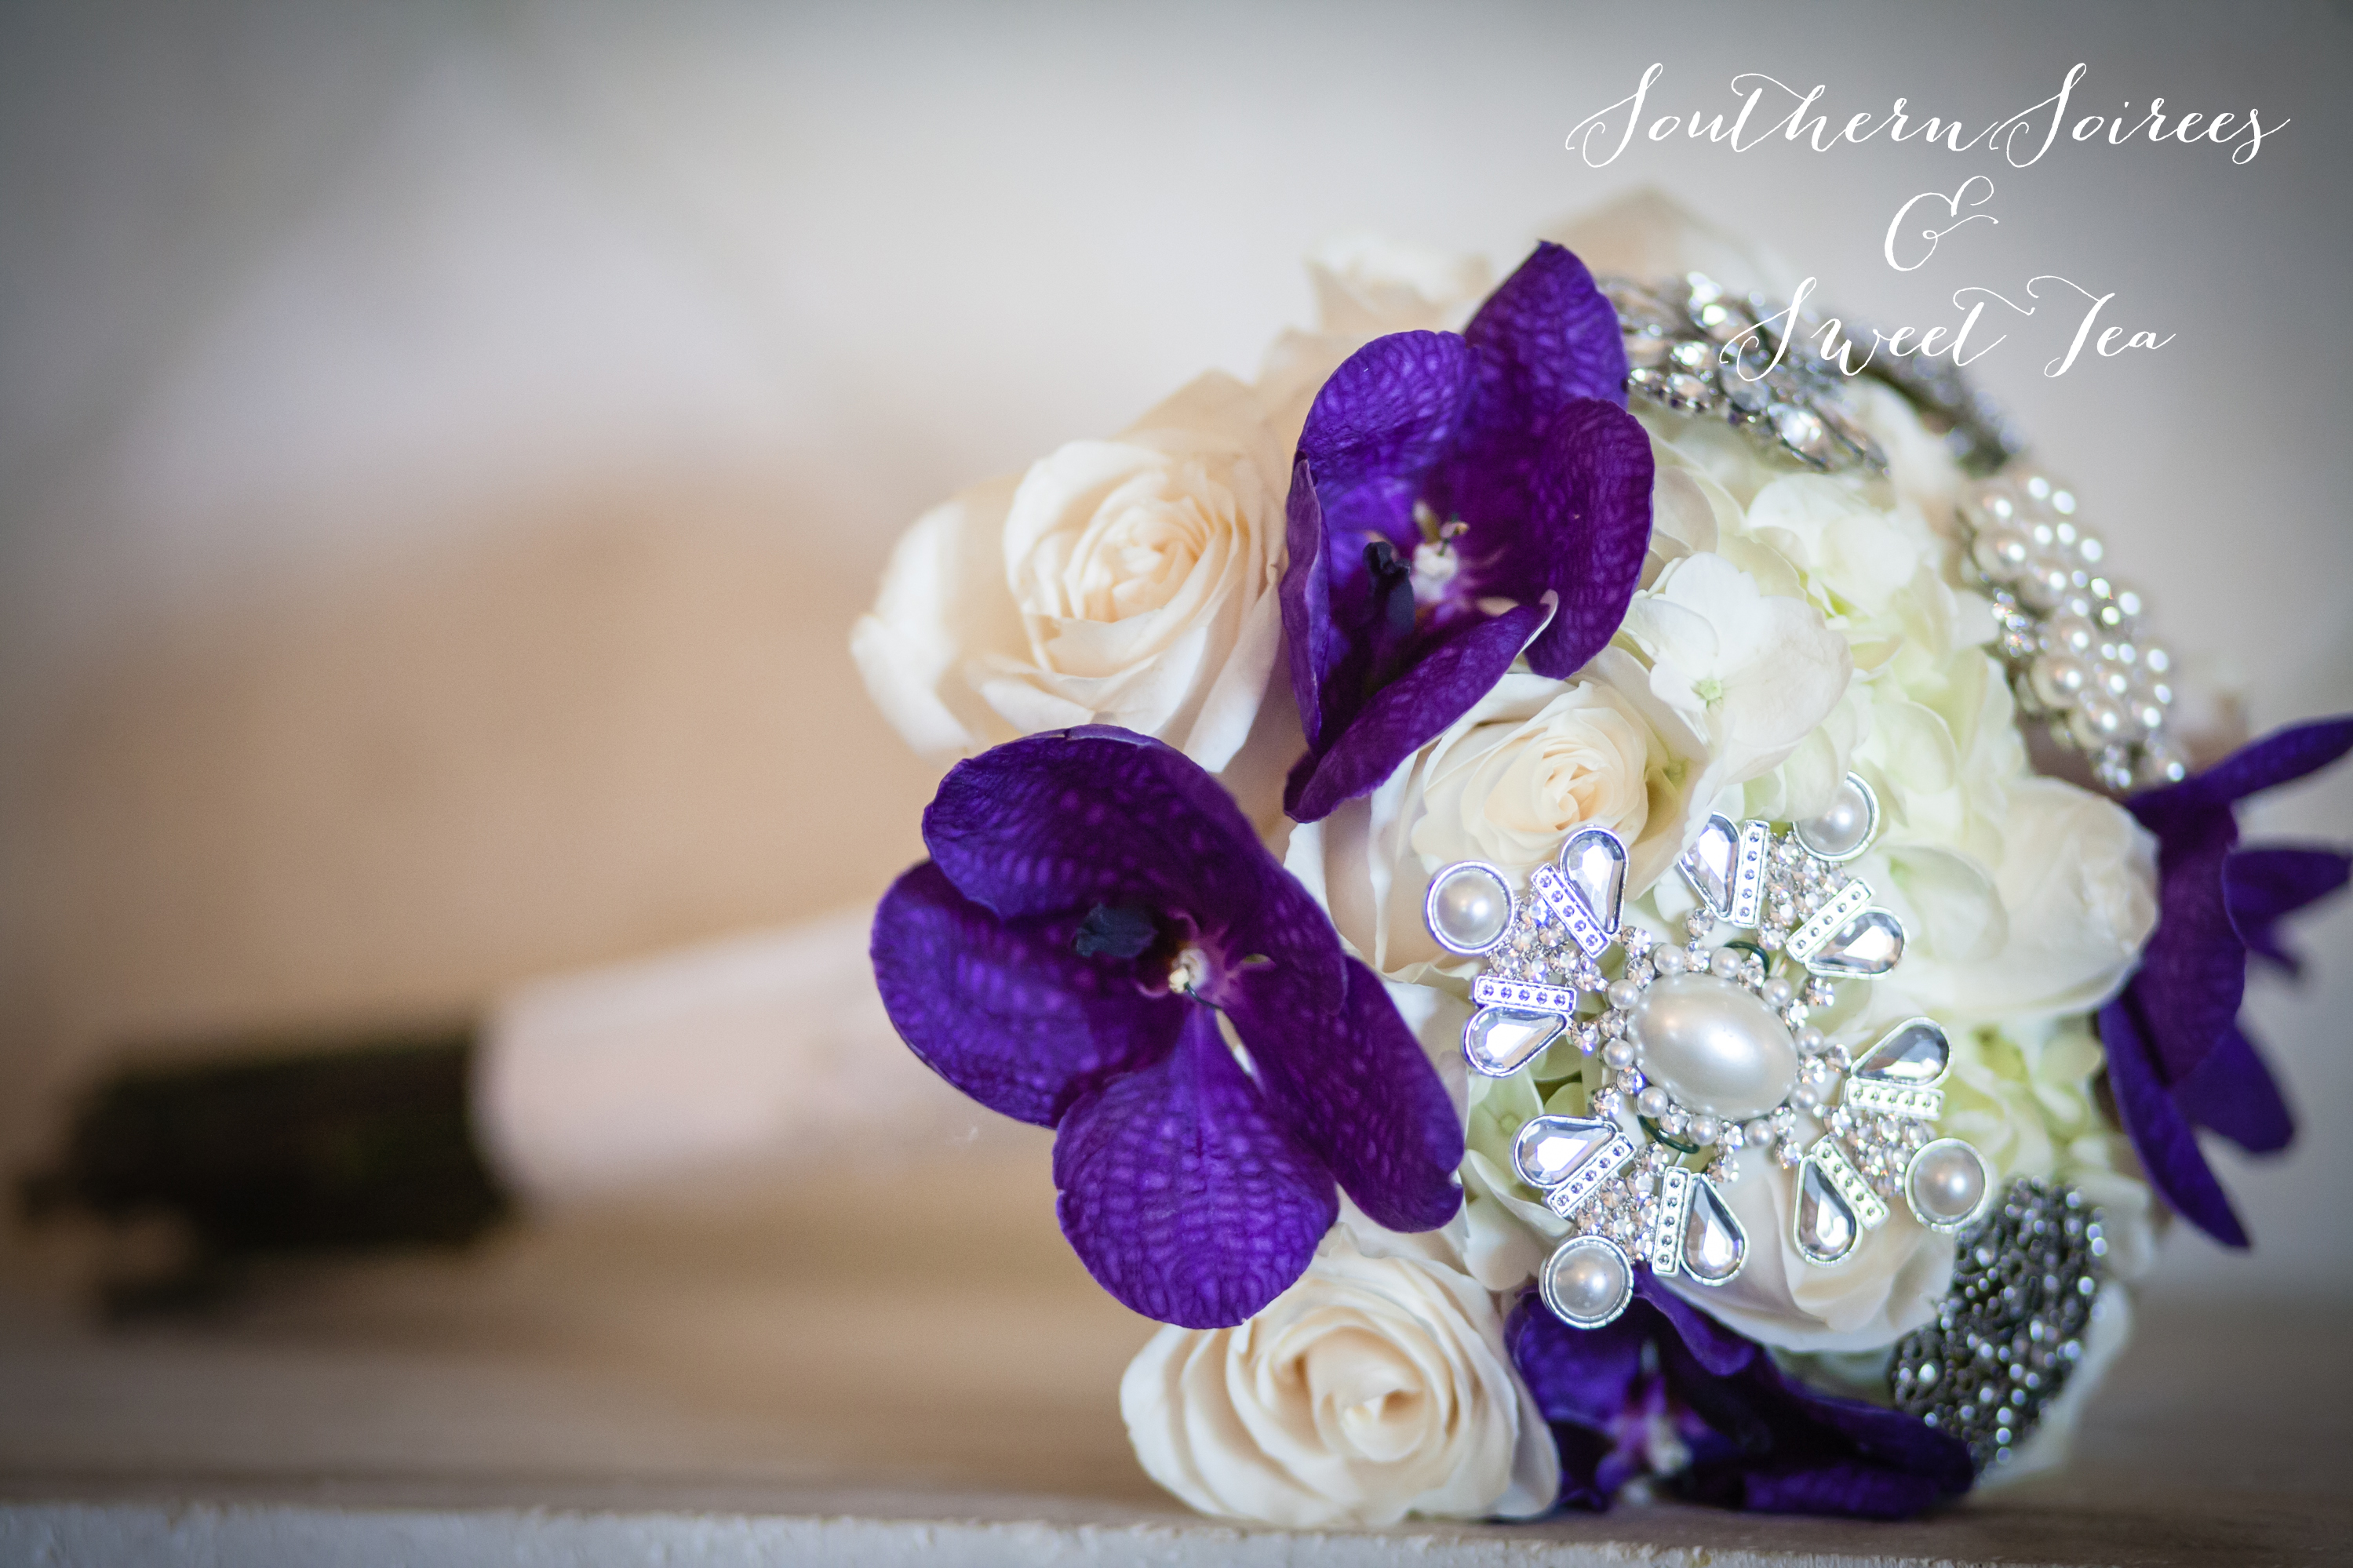
While I can’t take credit for my beautiful bouquet (Thank you Christian!) I can take say that I hand picked the brooches. I just LOVE the idea of brooch bouquets.  From Macy’s to Hobby Lobby and Charming Charlie, I spent a lot of time searching for the perfect brooches. It wasn’t easy but I was SO happy with the results.

PARAw_0230 copy

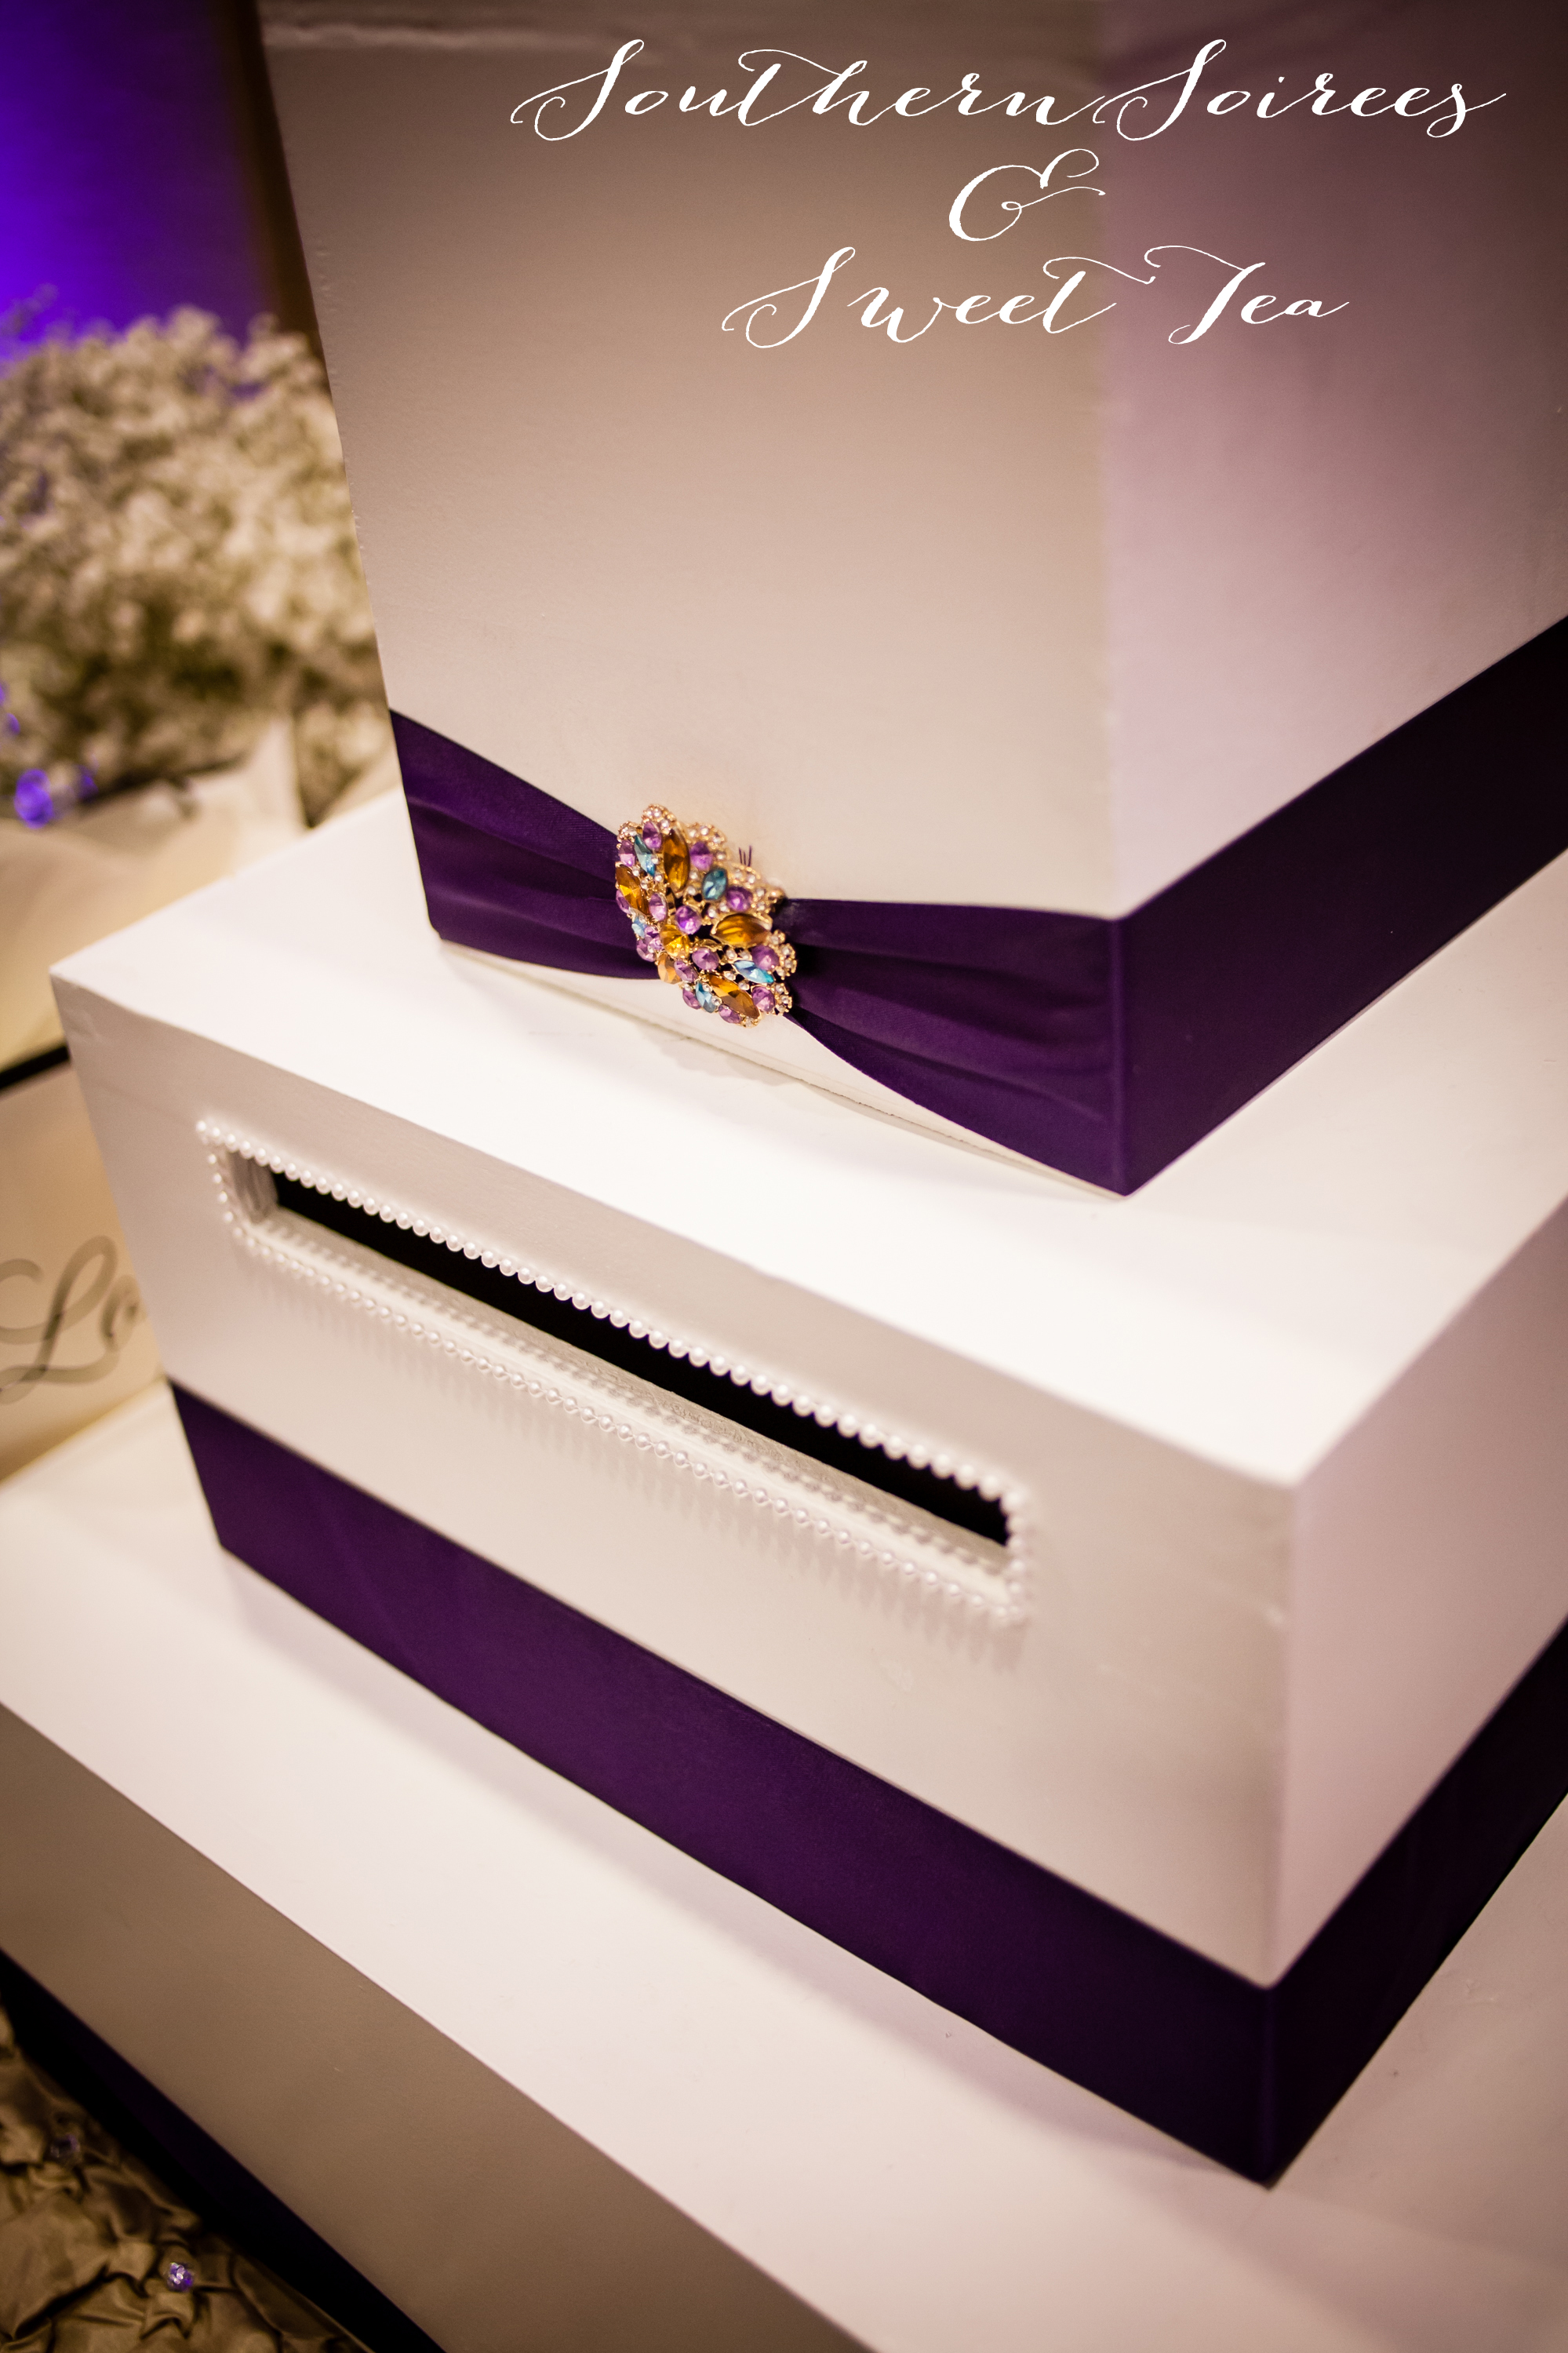
After seeing cardboard card boxes sell for almost $150 online, John and I decided to take on the project of making our own box. This box is 100% custom. We cut the wood, sanded, painted and added all the embellishments. We were SO proud of the final result. It has now become our “family” card box and has been used in 2 other weddings.

PARAw_0214 copy    JF-184

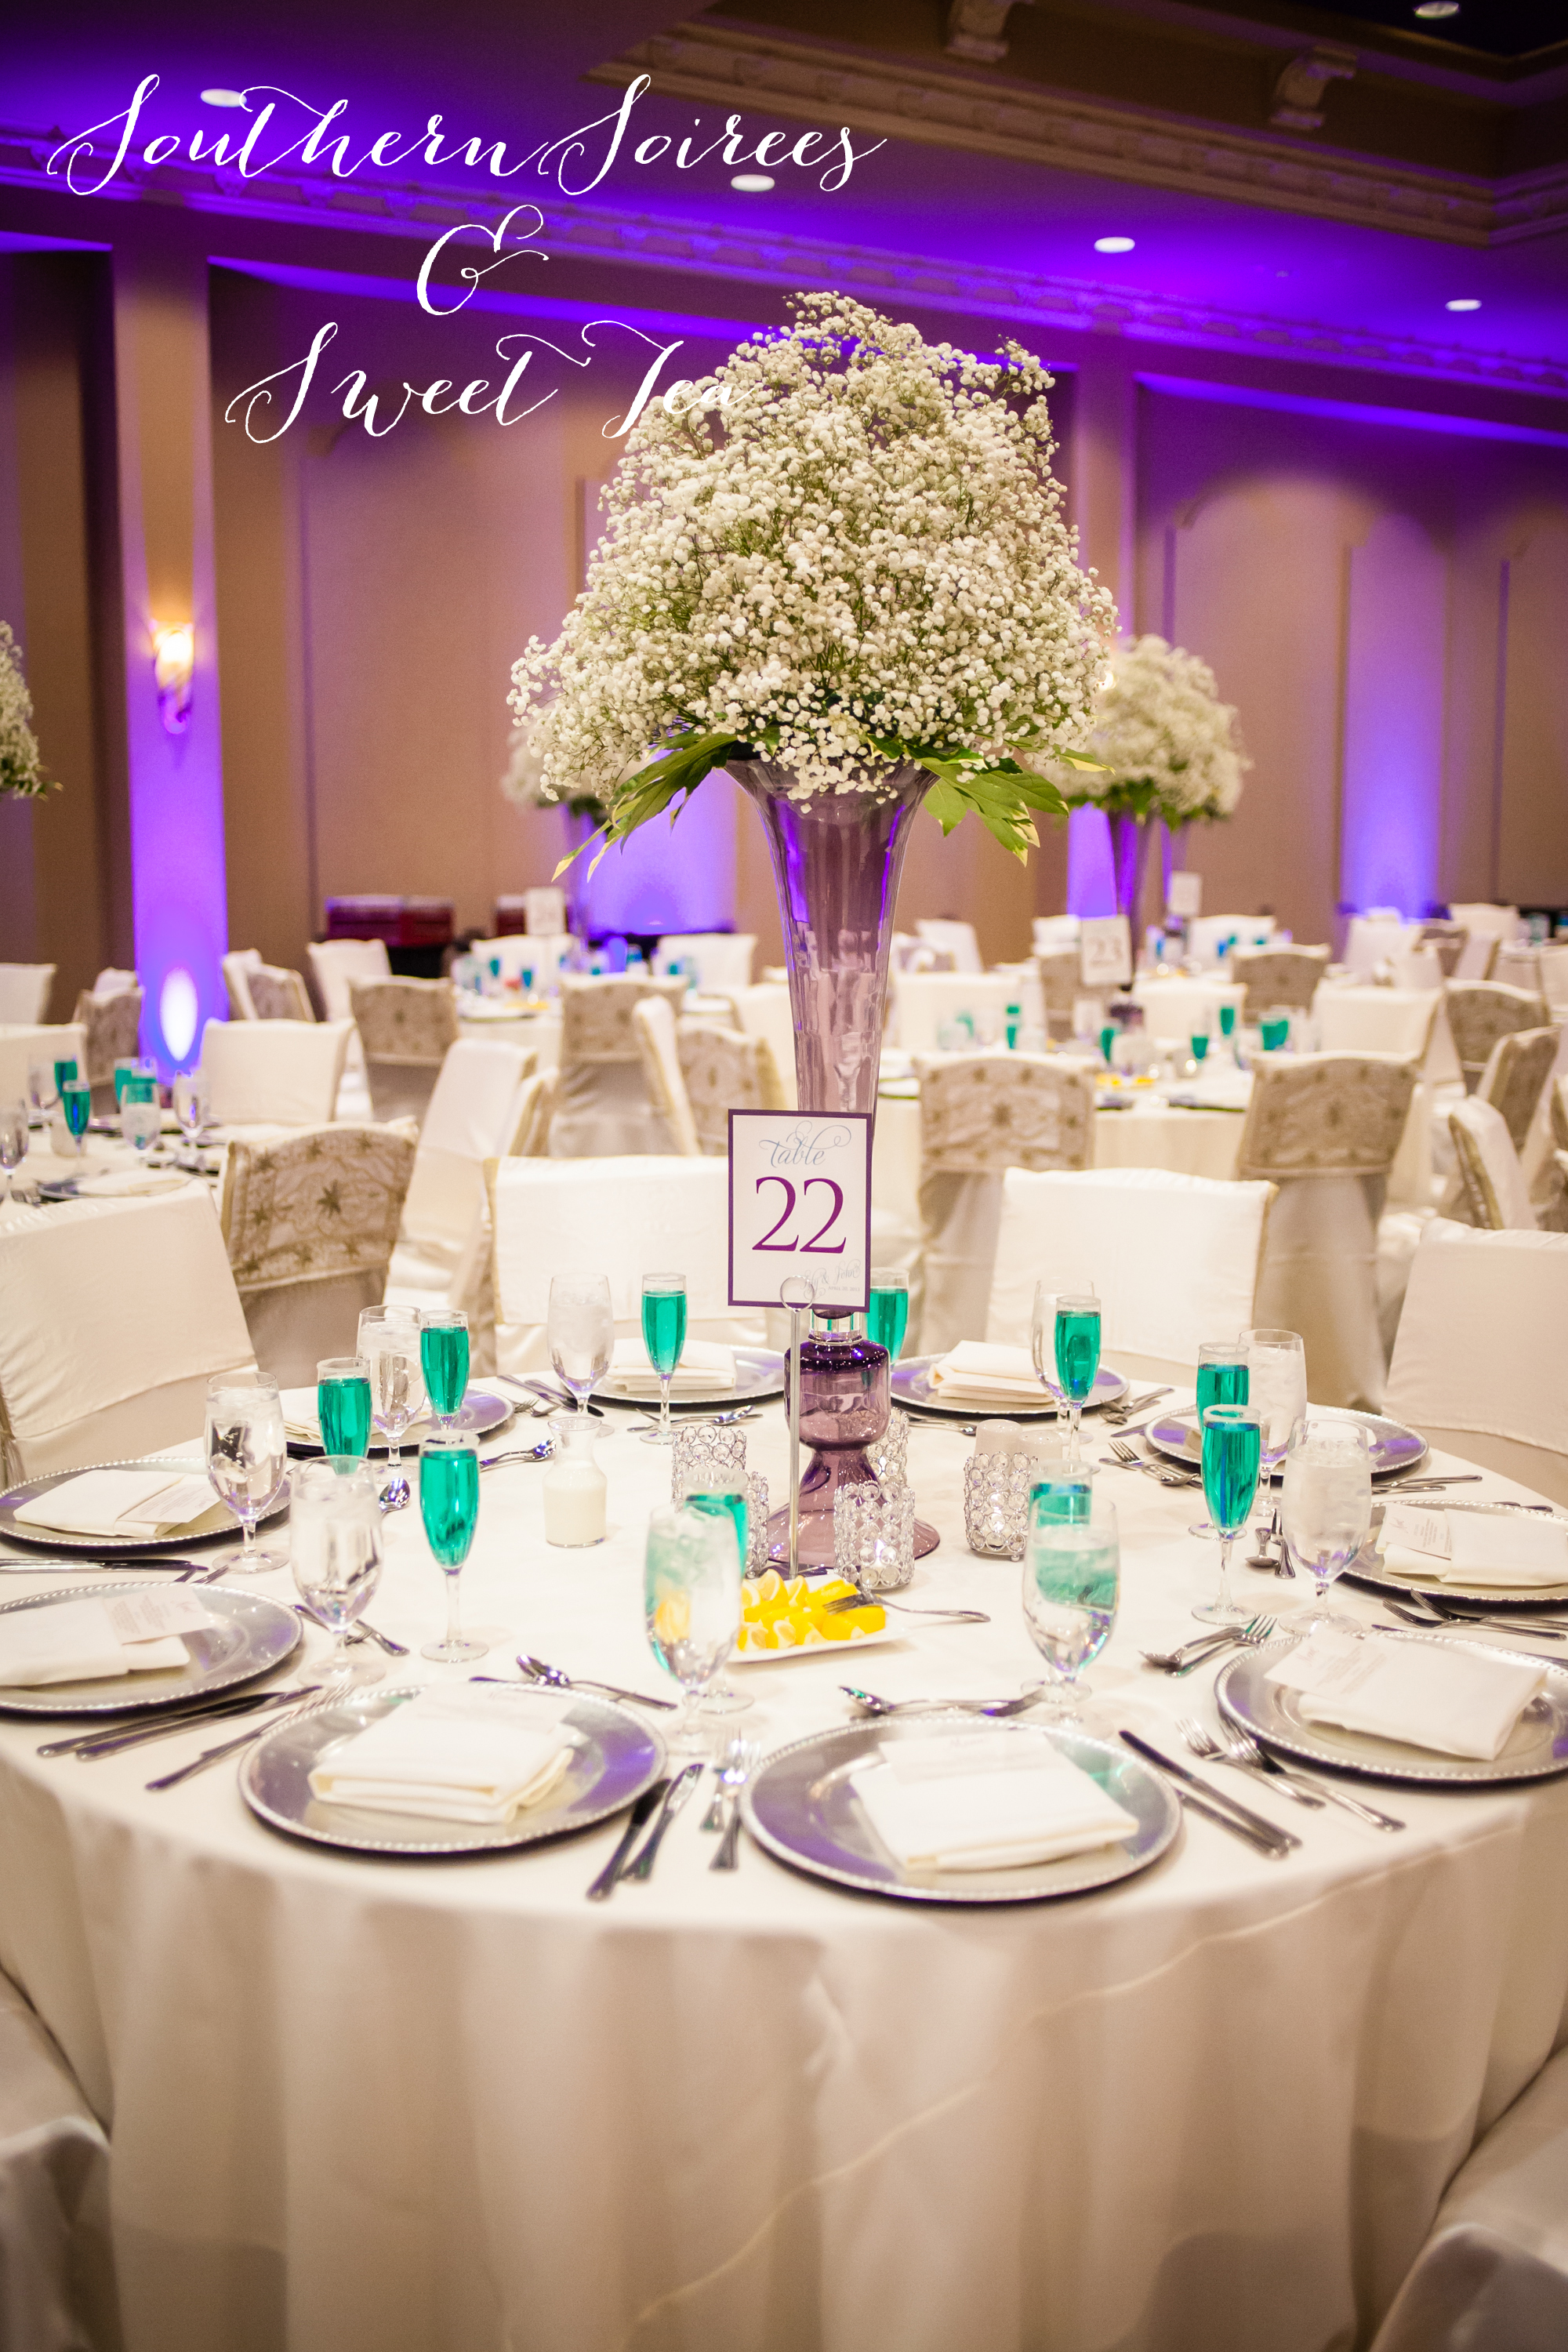
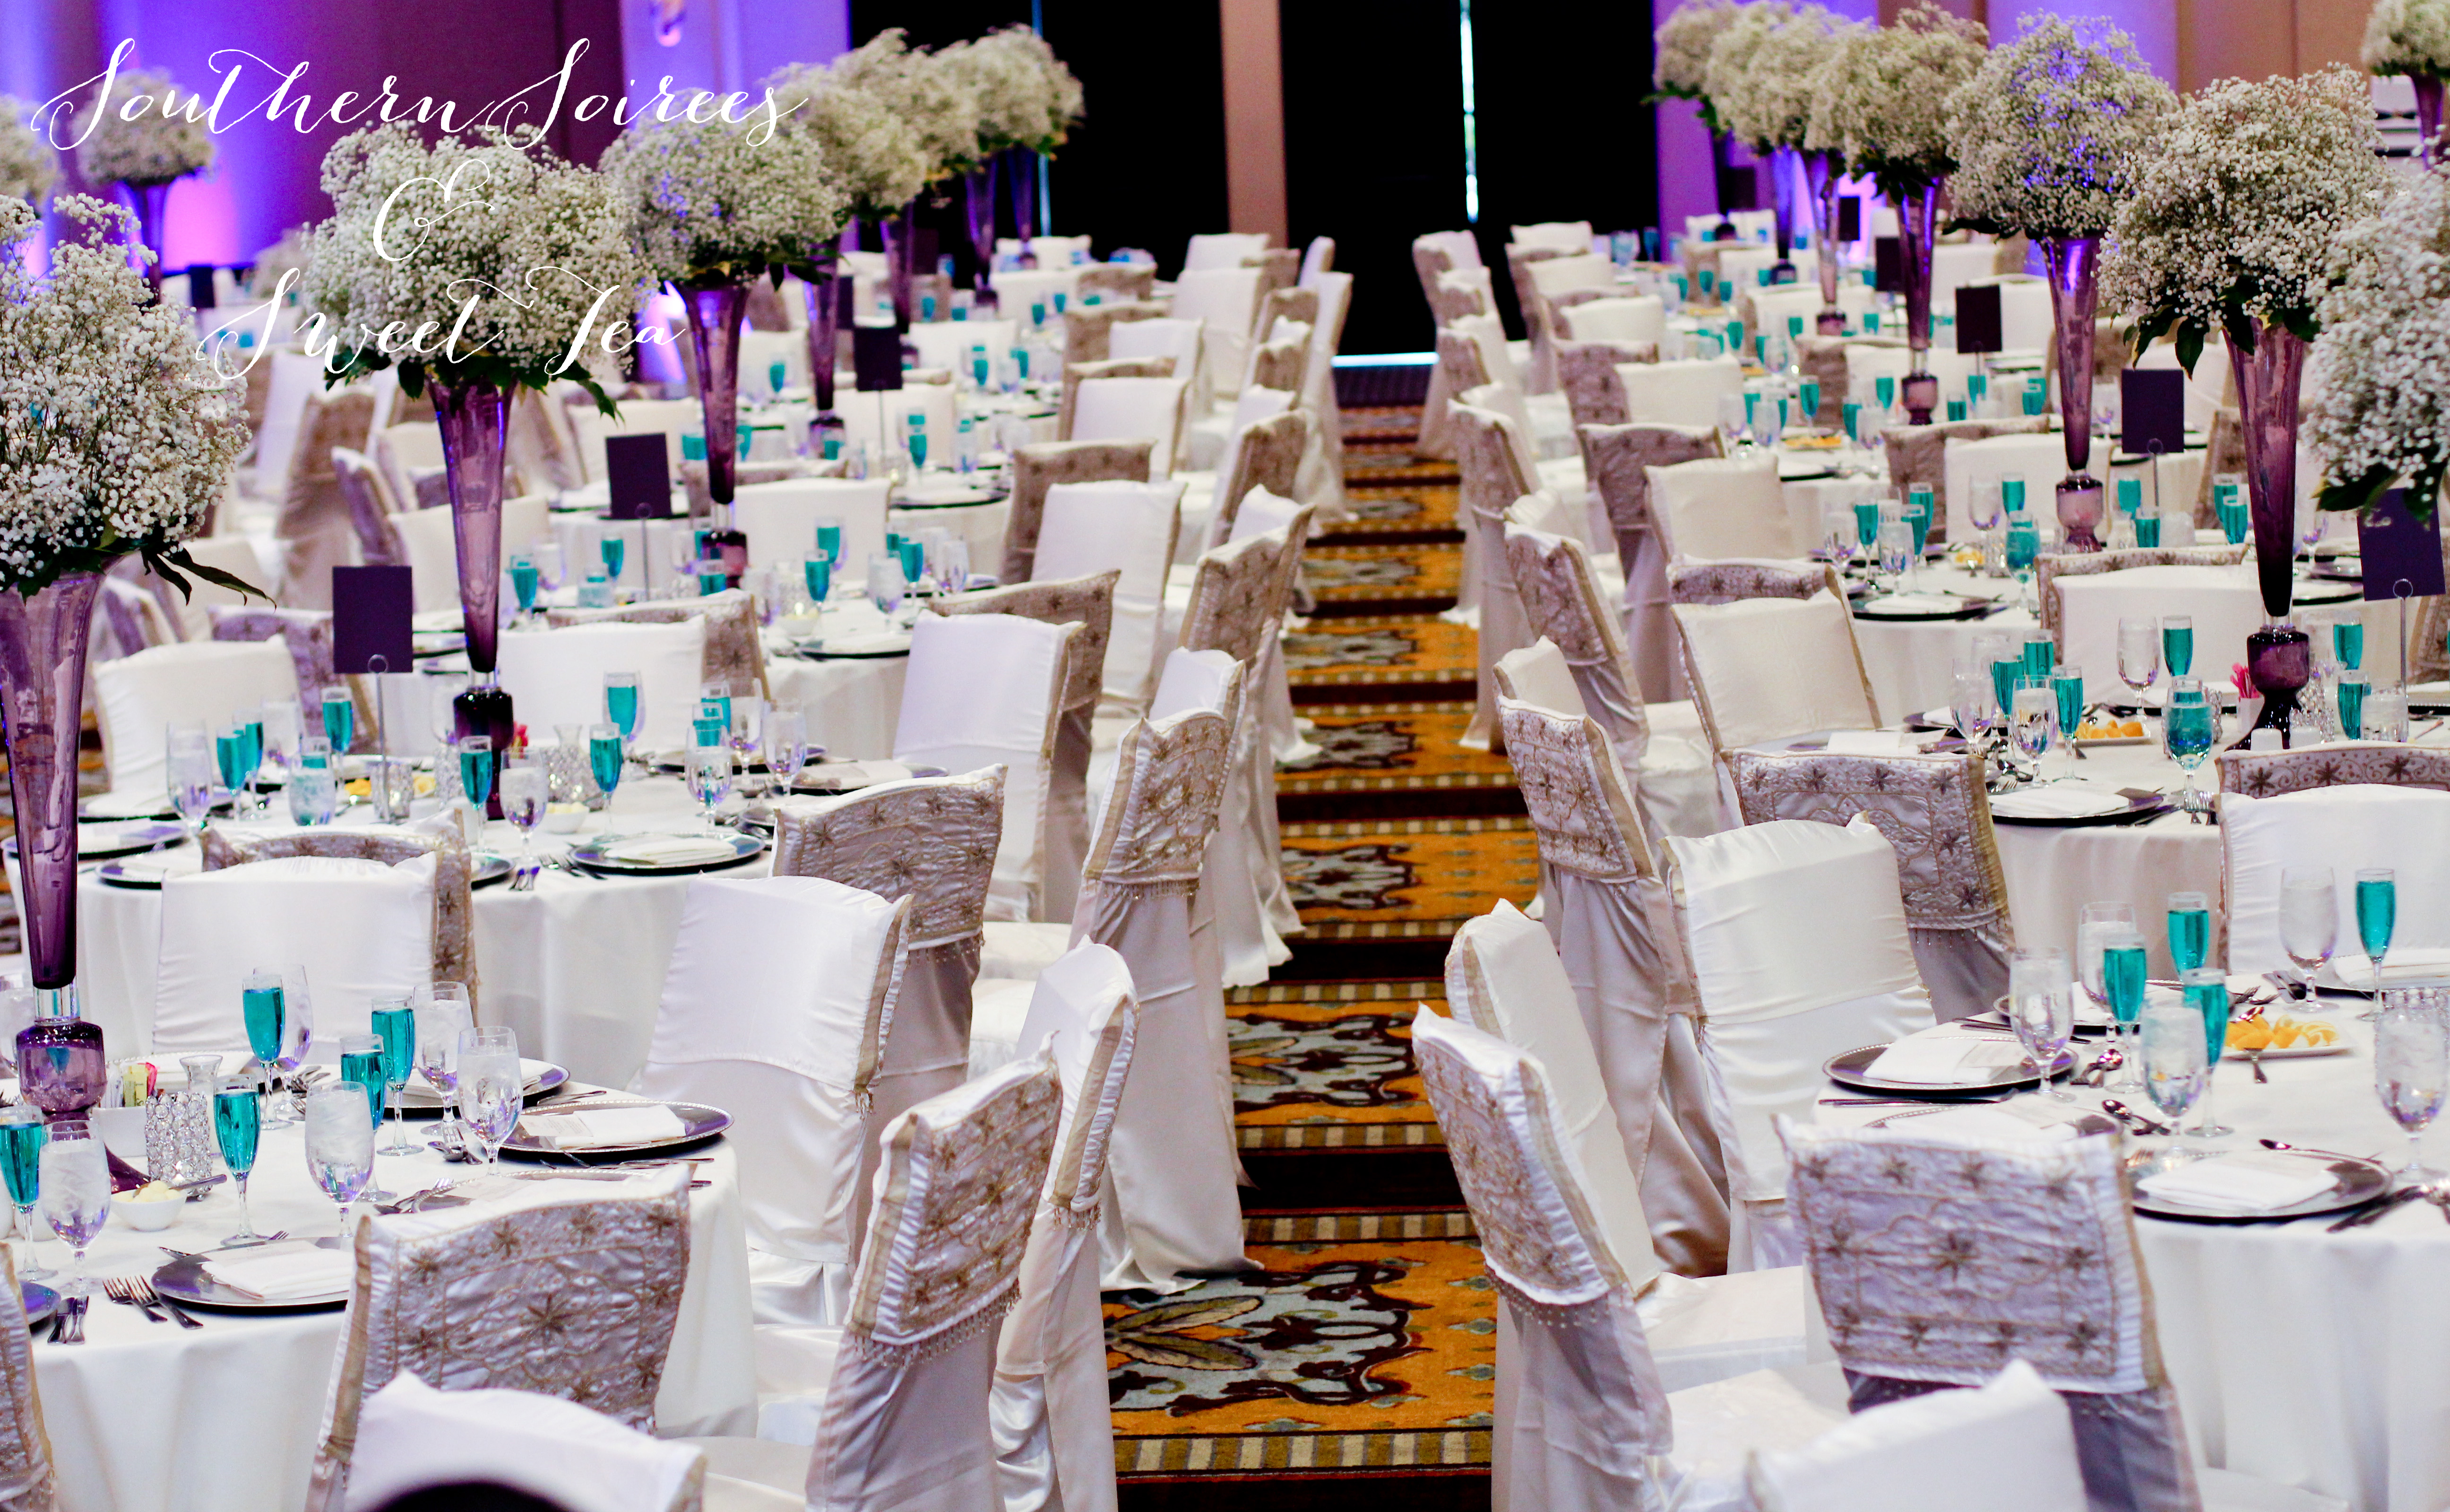
From the chair covers to the blue drinks, I picked EVERY detail of the reception table settings. Our decorator Perfect Touch Linens did a wonderful job having my vision become a reality. When John and I saw the purple vases at Z Gallerie and knew we wanted them for our reception. We ordered EVERY one they had. On top we added Baby’s Breath centerpieces. Then we added charger plates with menu cards as well bling votives on every table. I also made custom table numbers! I just LOVE, LOVE, LOVE these tables!

PARAw_0078 copy PARAw_0077 copy

And finally, our cake.. This was something that I was a little worried about when i designed and ordered it, but when I saw it at the wedding, I was so happy. This cake is actually a fake cake! Only the second tier is real. It looks all real doesn’t it?? Our baker did a wonderful job with this. The orchids looked so beautiful and went perfect with our purple and teal decor.

PARAw_0465

Our wedding was a wonderful day we shared with our family and friends. I am so happy we were able to use DIY skills to add our special touches our big day!

                                                                                                                                                                               – xoxo, Fify

Vendor Credits:

Wedding Planner – Soiree Bliss

Venue – Bayou City Event Center

Decorator – Perfect Touch Linens

Photographer – Khloe Madison Weddings & Charles Edward (family friend)

Florist – Flowers By Nino

Cake – Le Duc Gourmet Bakery

DIY Hydrangea Wedding Bouquets

Anyone going through the wedding planning process knows that weddings are EXPENSIVE! One wedding project for any DIY bride is making Hydrangea wedding bouquets. We did this for my wedding and with a little research and some happy helpers, we successfully made beautiful and more importantly AFFORDABLE Hydrangea bouquets.

Another great thing about DIY’ing is that you can always learn from your experience so you can do better the next time!

A few lessons learned from my wedding:

1. Hydrangeas need A LOT OF WATER.  One bouquet slipped out of the water and wilted before the ceremony.

2. Start wrapping the outer ribbon from the bottom and work your way up. Other wise the pins will visible from the bottom.

PARAw_0124

A few of the bouquets. Beautiful..but you can definitely notice the pins on the bottom.

For Christy’s wedding (you may remember her from the rustic bridal shower we blogged about a few weeks ago), I volunteered to make bouquets for her bridal party of 10. I tried my best to take pictures throughout the entire process, but we all know I’m not the best at that. I was able to take pictures of the important parts, so hopefully this will help you to make your own bouquets!

 For both weddings, I ordered White Hydrangeas from Sam’s Club. I ordered them for delivery on Thursday for a Saturday morning wedding. I received a shipping confirmation once they were shipped and they were delivered via Fed Ex Thursday morning. I would HIGHLY recommend having them delivered 2 days before your event. They will arrive dehydrated and will need some time to reach their full bloom.

And here is where I SHOULD insert a picture of how they arrived. Instead, a description will have to do. The hydrangeas will arrive in a long floral box. Each bloom will have a plastic sleeve around it. The stem will also have a small plastic bag with water attached to the bottom. Each box will come with more detailed care instructions, but basically, after removing the plastic bag on the end, we cut the bottom of each stem at an angle under running water. We then removed the protective sleeve from the stems and all the blooms were placed in a large bucket (we used 5 gallon buckets from the hardware store) filled with cool water mixed with flower food. Tarp and old cardboard boxes were used to protect the wood floors just in case there was any spillage.

IMG_1059 copy    IMG_1153

Here are the blooms in buckets as soon as they arrived. Not looking too pretty.

After the hydrangeas are in the water, you get to sit back and relax for the next 24 hours. (At least you get to relax about the flowers..because we all know weddings tend to be stressful). This will give the hydrangeas enough time to drink up the water and rehydrate. They drink A LOT of water, so check the water level every few hours to make sure you don’t run low.

FullSizeRender copy  FullSizeRender_1 copy

Here are the blooms after being in water for few hours. Already starting to perk up.

(We also ordered lavender roses to make boutonnieres and small arrangements for the rehearsal dinner. Blog post on DIY Boutonnieres coming soon!)

IMG_1068 copy IMG_1069 copy

The next morning..Much better!

Friday afternoon, we started the assembly process of the bouquets. They needed to be transported to the venue while in water and we didn’t want to take the chance of water ruining the ribbon. We decided to do half the assembly at home and the rest the morning of the wedding. I DO NOT, I repeat, I DO NOT recommend for a bride to do this the morning of her wedding. Please don’t do that to yourself..find a friend or family member that is willing to do this part. This should not be your worry the morning of your wedding. Okay, my rant is over..back to bouquets.

 The first step to assembly is to gather your supplies.

FullSizeRender

 Floral Scissors, Ribbon, Floral Tape, Flower food and Pins.

We decided 3 blooms were the perfect size for the bouquet. We took 3 stems and wrapped them tightly with the green floral tape. We measured about 2 fists length to determine how much of the stem to wrap. As soon as that was done, we placed them back in the water immediately. DO NOT cut the stems to bouquet length at this point. We kept the stems long so they would fit in the buckets without damaging the blooms. We changed the water, added more flower food and let these beauties sit over night to stay hydrated and full.

IMG_1074 copy

The morning of the wedding, we then transported all the bouquets to the wedding venue to complete the assembly. At this point, we (hubby wrapped while I photographed) wrapped the stem covered in green floral tape with ivory ribbon. We started from the bottom and worked our way up.

  IMG_1078 copy    IMG_1079 copy

Once the ribbon reached the top, we placed 2-3 pins to hold the ribbon in place. The pins were pointed downward into the stem to secure the ribbon without sticking out of the stem.

IMG_1076 copy  IMG_1077 copy

 And you are done! Easy, right?

To make sure these were in water as long as humanly possible, we took the ribbon wrapped bouquets to the bridal room in the buckets. When the bridesmaids were all dressed and ready to walk out to take pre-ceremony pictures, hubby hand cut the stems of each bouquet with floral shears and handed them out.

         hydrangea2

Still waiting on the professional pictures, but here are a few of the girls with their bouquets! I LOVE how they turned out!

The one thing I will have to say is that these things wilt QUICKLY without water. The flowers were handed out at 9:45am and by the end of the reception at 2:45pm, some were already looking pretty bad. In hindsight, it would have been a good idea to have small vases for the bridal party to place their bouquets in during the ceremony. But like I said, that’s the best part of DIY’ing..you can always learn a lesson for the next time!

These bouquets could have easily cost $80 EACH. But spending $70 in flowers and some additional costs for ribbon and other supplies, we were able to make 10 fabulous Hydrangea bouquets! Good luck to all the DIY brides!

                                                                                                                                                                                      – xoxo, Fify